

TL;DR:
- A battery backup installation involves thorough load analysis, site compliance, and a structured four-stage commissioning process to ensure reliability and safety. Proper planning, permit acquisition, and precise cable termination are vital to prevent failures and maintain warranties. Post-installation, regular checks, firmware updates, and professional maintenance are essential for optimal performance and longevity.
A battery backup installation workflow is the step-by-step process of safely integrating a battery storage system into your home’s electrical setup to provide reliable power during outages. The industry term for this process is battery energy storage system (BESS) commissioning, and it covers everything from load analysis and permit approval to physical mounting, wiring, and final testing. A standalone setup takes 30 to 60 minutes, while a solar-integrated system with complex wiring can take a professional team one to two full days. Getting each phase right protects your home, keeps your warranty valid, and gives you power you can actually count on.
What does the battery backup installation workflow involve?
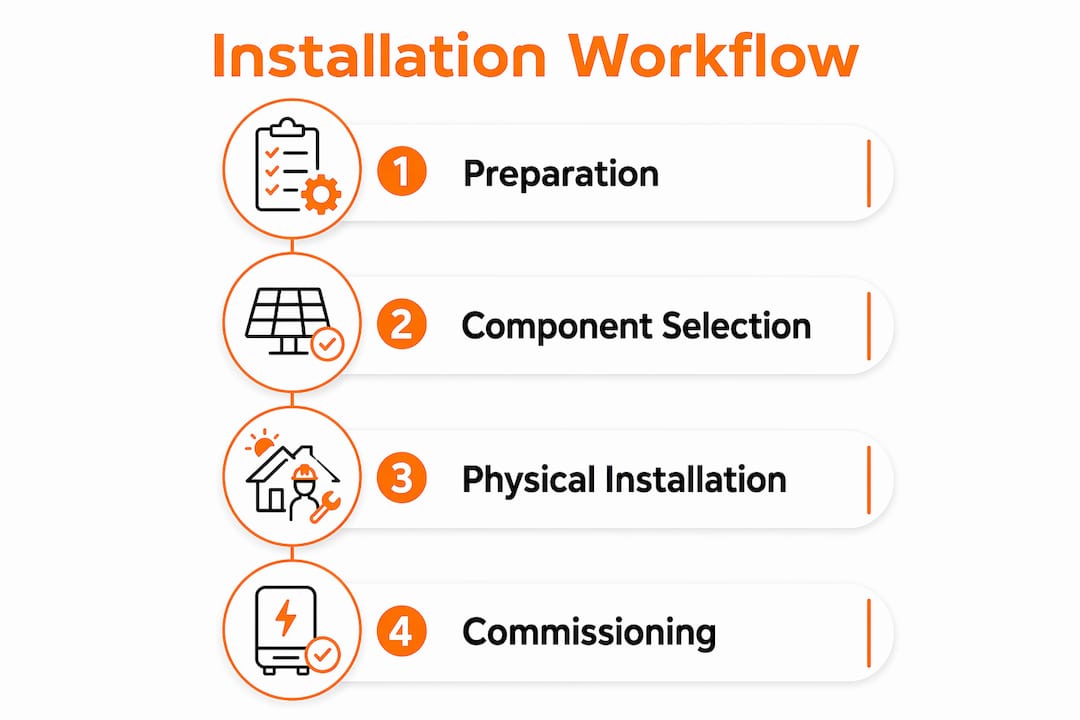
The full backup power setup process has four distinct phases: preparation, component selection, physical installation, and commissioning. Most homeowners focus only on the hardware, but the planning phase is where the outcome is decided. Load analysis and backup planning must happen before you purchase a single piece of equipment, because an undersized battery or mismatched inverter will fail to supply your intended loads. Systems like the Tesla Powerwall 3, Enphase IQ Battery 5P, and Franklin Electric apower are all sized and configured based on your specific household energy profile, not a one-size-fits-all spec sheet.
How to prepare for your battery backup installation
Preparation is the phase that separates a smooth installation from a costly redo. Before any equipment arrives, you need to complete three tasks: a home load assessment, a site location evaluation, and permit acquisition.

Conducting a home load assessment
Your load assessment identifies which appliances you want to keep running during an outage. Write down the wattage of your refrigerator, medical devices, lighting, HVAC, and any other critical loads. Add those numbers up to determine the minimum kilowatt-hour (kWh) capacity your battery system must deliver. Improper matching of battery size and inverter power is the leading cause of system failures and unmet backup expectations.
Understanding permit and location requirements
Most jurisdictions require electrical permits and utility approvals before you power on a home battery system. Skipping this step can void your homeowner’s insurance and your equipment warranty. Location matters just as much as paperwork. Fire safety regulations in 2026 prohibit installing batteries in spaces that block emergency egress or restrict airflow, which rules out many lofts, small closets, and tight utility rooms. Compliance with NFPA 855 and PAS 63100 standards is mandatory for fire safety in 2026, so confirm your chosen location with your installer before ordering equipment.
Pro Tip: Print a copy of your home’s electrical panel schedule and bring it to your first consultation. It saves time and helps your installer size the system accurately from day one.
Before installation day, gather these documents and tools:
- Your most recent 12 months of utility bills (to confirm energy usage patterns)
- Your home’s electrical panel schedule or a photo of the breaker box
- Local permit application forms (available from your city or county building department)
- Manufacturer spec sheets for any equipment you are considering
- Contact information for your utility company’s interconnection department
What components do you need for a battery backup system?
Choosing compatible components is the most technical decision in the backup power setup process. The four core components are the battery, the inverter, the transfer switch, and the safety devices.
| Component | Common options | Relative cost | Installation complexity |
|---|---|---|---|
| Battery (lithium-ion) | Tesla Powerwall 3, Enphase IQ Battery 5P, LG RESU | High | Moderate |
| Inverter (hybrid) | SolarEdge, Enphase IQ8, Sol-Ark | Moderate to high | Moderate to high |
| Transfer switch | Generac, Square D, Eaton | Low to moderate | Moderate |
| Safety devices (BMS, breakers, disconnects) | Integrated or third-party | Low | Low |
Batteries come in two coupling types: AC-coupled and DC-coupled. AC-coupled systems like the Enphase IQ Battery connect after the inverter and work with existing solar setups. DC-coupled systems like the Tesla Powerwall 3 connect before the inverter and are more efficient for new installations. The battery management system (BMS) is built into most modern lithium-ion batteries and constantly monitors voltage, temperature, and current to prevent overcharge and deep discharge. This is what gives lithium batteries their long cycle life, so never purchase a battery without a certified BMS.
The transfer switch is what allows your battery to power your home’s existing circuits rather than just devices plugged directly into it. Without a transfer switch, your battery system operates as a standalone unit and cannot feed your home’s wiring. A critical load panel paired with an automatic transfer switch is the standard solution for whole-home or partial-home backup.
Pro Tip: If you are adding a battery to an existing solar system, confirm with your installer that the inverter is hybrid-compatible before purchasing. Retrofitting a non-hybrid inverter adds significant cost.
Before installation day, your installer should complete pre-assembly checks: confirm firmware versions on the inverter and BMS, verify all breaker ratings match the system design, and test communication between the monitoring app and the battery gateway.
Step-by-step installation process for your battery backup system
This is the phase most homeowners picture when they think about how to install a battery backup. The physical work follows a specific sequence, and skipping steps creates safety risks.
-
Mount the battery and inverter. Follow the manufacturer’s mounting instructions and local fire code clearances. Most lithium-ion batteries require a minimum of 12 inches of clearance on all sides for ventilation. Secure the mounting bracket to wall studs, not drywall alone.
-
Run and terminate all cables. Use the correct gauge wire for your system’s amperage rating. Torque wrenches must be used on every electrical connection to achieve proper contact pressure. Loose connections are the most common cause of latent failures, overheating, and voided warranties.
-
Install the transfer switch and critical load panel. Connect the transfer switch between your main panel and the critical load panel. Label every circuit clearly. The transfer switch enables battery power to flow through selected home circuits automatically when the grid goes down.
-
Complete all safety device connections. Install the DC disconnect, AC breakers, and surge protection devices per the system design. Verify that all breaker ratings match the equipment spec sheets.
-
Perform a pre-power safety inspection. Check every connection visually and with a torque verification. Confirm that ventilation clearances are maintained and that no cables are pinched or routed near heat sources.
-
Commission the system. This is the most critical and most often rushed step.
Commissioning is not a quick power-on test. The full process includes four distinct stages: Factory Acceptance Testing (FAT), Site Acceptance Testing (SAT), performance verification against design guarantees, and Baseline Capacity Testing to establish the warranty baseline and detect early degradation. Rushing commissioning risks latent faults that only surface during an actual outage.
After commissioning, your installer should set up the monitoring app (such as the Tesla app, Enphase Enlighten, or SolarEdge mySolarEdge), register the warranty, and walk you through startup and shutdown procedures. User training and warranty registration are part of a complete installation, not optional extras.
Pro Tip: Simulate a grid outage during commissioning by switching off your main breaker with your installer present. This is the only way to confirm the transfer switch and battery respond correctly before you need them for real.
How do you maintain and troubleshoot your battery backup system?
A well-installed system requires minimal maintenance, but a few regular checks keep it performing reliably for its full warranty period.
Watch for these common signs of installation issues:
- Inverter error codes displayed on the unit or in the monitoring app, which often indicate communication faults or wiring problems
- Unexplained battery capacity drops in the first 90 days, which can signal a BMS calibration issue or a loose connection
- Tripped breakers on the critical load panel, which suggest the system is being asked to supply more load than it was designed for
- Overheating near cable terminations, which points directly to poor cable torque during installation
Your annual maintenance checklist should include:
- Checking ventilation clearances and removing any obstructions
- Running a firmware update on the inverter and battery gateway
- Reviewing the monitoring app’s battery health report
- Inspecting all visible cable runs for wear or damage
- Confirming your permit and inspection records are filed and accessible
Professional installation is strongly advised because most manufacturer warranties and local electrical codes require certified installation to remain valid. If your system shows persistent errors or capacity loss after the first year, contact your installer before attempting any repairs. Unauthorized repairs void warranties and create safety risks. You can also review a detailed battery backup checklist to stay current with 2026 compliance requirements.
Pro Tip: Keep a physical folder with your permit, inspection sign-off, warranty registration confirmation, and installer contact information. If you sell your home, this documentation adds real value and speeds up the buyer’s due diligence.
For homeowners comparing battery backup to other options, a backup power solutions overview can help clarify which system type fits your energy goals and budget.
Key takeaways
A successful battery backup installation workflow depends on thorough load planning, code-compliant site selection, proper cable termination, and a complete four-stage commissioning process.
| Point | Details |
|---|---|
| Start with load analysis | Calculate your critical appliance wattage before selecting any equipment to avoid undersizing. |
| Permits are non-negotiable | Most jurisdictions require permits and inspections; skipping them voids warranties and insurance. |
| Torque every connection | Use a torque wrench on all terminals to prevent overheating and latent failures. |
| Commission in four stages | FAT, SAT, performance verification, and baseline capacity testing are all required, not optional. |
| Annual maintenance protects your investment | Firmware updates, ventilation checks, and health monitoring extend system life and keep warranties valid. |
What I’ve learned after seeing hundreds of battery installations
I have seen homeowners spend weeks researching battery brands and almost no time on the commissioning phase. That is the wrong priority. The brand of battery matters far less than whether the system was commissioned correctly. A Tesla Powerwall installed without proper SAT and baseline capacity testing is a liability. A lesser-known LiFePO4 system installed by a thorough, certified team will outperform it every time.
The 2026 fire code changes are catching a lot of homeowners off guard. Locations that were acceptable two years ago, like a small utility closet or a garage corner with limited airflow, are now non-compliant. I have seen installations delayed by weeks because the homeowner had already purchased mounting hardware for a location the inspector rejected. Talk to your installer about location before you do anything else.
My strongest advice: do not treat professional installation as an optional upgrade. It is the single factor that determines whether your system works when the grid goes down, whether your warranty pays out if something fails, and whether your home insurance covers a battery-related incident. The savings from a DIY approach are real. The risks are realer.
— Anthony
Ready to install a battery backup system in your San Antonio home?
At Alphasolarsa, we design and install battery backup systems built around your home’s actual energy needs, not a generic package. Every installation includes a full load analysis, permit management, compliant site selection, and a complete four-stage commissioning process so your system works the first time and every time after that.

Our team handles residential solar and battery installation across San Antonio, and we stay current with 2026 fire and electrical codes so you do not have to. Whether you are starting from scratch or adding a battery to an existing solar system, we will walk you through every step. Contact Alphasolarsa today to schedule your free home energy consultation and get a system designed specifically for your home.
FAQ
How long does a battery backup installation take?
A standalone battery setup takes 30 to 60 minutes, while a solar-integrated system with complex wiring takes a professional team one to two full days.
Do I need a permit to install a home battery backup system?
Most jurisdictions require electrical permits and utility approvals before a home battery system can be powered on. Skipping permits can void your warranty and homeowner’s insurance.
What is the difference between AC-coupled and DC-coupled battery systems?
AC-coupled batteries like the Enphase IQ Battery connect after the inverter and work well with existing solar systems. DC-coupled batteries like the Tesla Powerwall 3 connect before the inverter and are more efficient for new installations.
Can I install a battery backup system myself?
DIY installation carries serious risks, including voided manufacturer warranties, fire hazards, and code violations. Most local electrical codes require certified installation for the system to be legally compliant and insurable.
How do I know if my battery backup system is working correctly?
Simulate a grid outage during commissioning by switching off your main breaker with your installer present. After that, monitor your system through the manufacturer’s app and watch for error codes, unexpected capacity drops, or tripped breakers on your critical load panel.