
TL;DR:
- A professional installation ensures safety, code compliance, and maximum system efficiency.
- Permitting and inspections in San Antonio are essential for system activation and legal operation.
- Properly installed solar batteries provide reliable backup power and enhance energy independence.
When the next summer storm rolls through San Antonio and the grid goes down, your home keeps running. The lights stay on, the AC holds, and your refrigerator doesn’t skip a beat. That’s the peace of mind a solar battery delivers. With electricity rates in Texas continuing to climb, more homeowners are pairing solar panels with battery storage to cut their dependence on the utility grid. This guide walks you through exactly what to expect, from the prerequisites and permits to activation and maximizing your savings, so you can move forward with confidence.
Table of Contents
- What you need before installing a solar battery
- Step-by-step: The professional solar battery installation process
- DIY vs. professional installation: What homeowners must know
- Activation, inspections, and maximizing system benefits
- Why professional installation in San Antonio pays off long-term
- Ready for reliable solar battery power in San Antonio?
- Frequently asked questions
Key Takeaways
| Point | Details |
|---|---|
| Get a site assessment | A formal assessment ensures your home is suitable and identifies needed upgrades before installation. |
| Use a certified pro | Professional installation safeguards your warranty, safety, and compliance with San Antonio codes. |
| Maximize your ROI | Take advantage of utility rates and tax credits to make the most of your solar battery investment. |
| DIY carries big risks | Homeowner installs can void warranties, reduce efficiency, and delay payback. |
What you need before installing a solar battery
Now that you understand the value a solar battery brings, start with these crucial prerequisites.
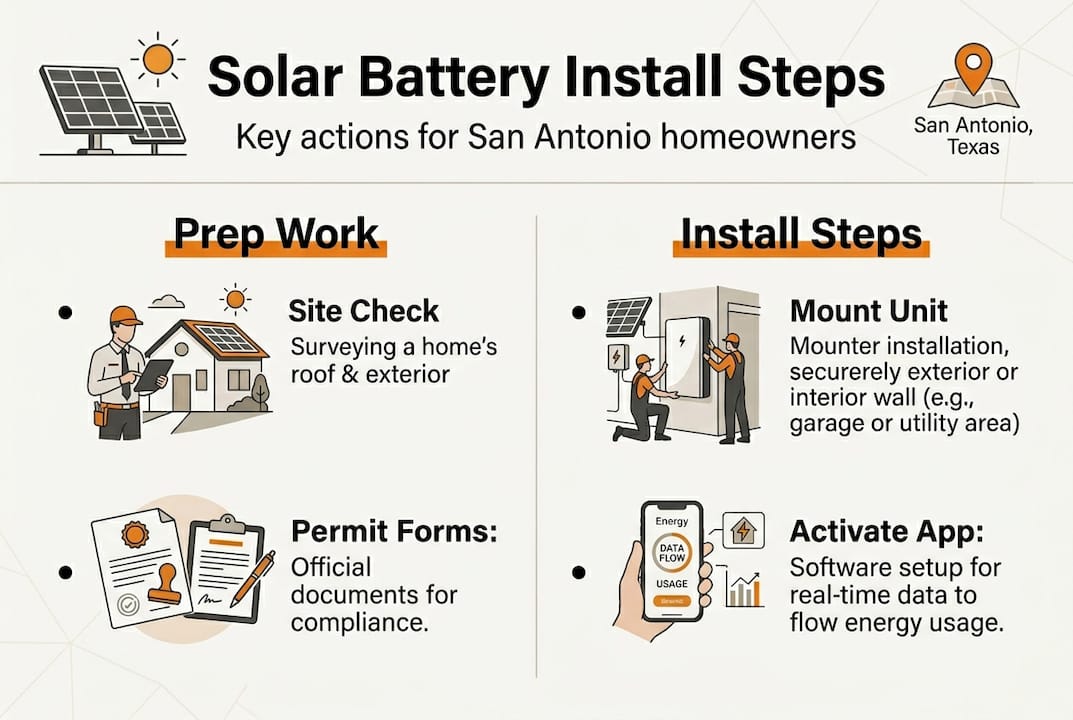
Before anyone touches a wire or mounts a battery, you need to confirm your home is ready for the upgrade. Skipping this step can cost you time, money, and frustration down the road. Professional installation involves thorough site assessment, permitting, and compliance with local codes, so preparation is not optional.
Start with a structural and electrical check. Your roof must be able to support any additional panel weight if you’re expanding your system. Your home’s electrical panel needs to handle the added load. If your panel is older or undersized, an upgrade may be required before the battery is installed. Review your San Antonio electrical system to understand whether your current setup is compatible.
Hardware and tools you’ll need (or your installer will bring)
| Item | Purpose |
|---|---|
| Solar battery unit | Stores energy from your panels |
| Hybrid or battery inverter | Converts stored DC energy to usable AC power |
| Mounting brackets | Secures battery to wall or floor |
| Conduit and wiring | Safely routes electrical connections |
| Disconnect switch | Enables safe system shutoff |
| Monitoring device | Tracks battery charge and output |
Permitting is a step many homeowners underestimate. In San Antonio, you’ll need approval from the City of San Antonio’s Development Services Department and, in many cases, coordination with CPS Energy. These permits ensure your system meets local building and electrical codes. The good news is that understanding the solar power benefits early in the process helps you build a stronger case for expedited review.
You also need to confirm inverter and battery compatibility. Not every battery works with every inverter. Some systems are designed as closed ecosystems, meaning a Tesla Powerwall integrates best with certain inverters, while brands like Enphase or SolarEdge have their own preferred pairings.
- Confirm your existing inverter brand and model
- Verify compatibility with your chosen battery system
- Check whether a new hybrid inverter is needed
- Confirm your battery’s voltage matches your system design
Pro Tip: Ask your installer to pre-submit permit applications digitally through the City of San Antonio’s online portal. This can shave days off your approval timeline and keeps the project on schedule.
Step-by-step: The professional solar battery installation process
Once everything is in place, here’s what the installation journey looks like, step by step.
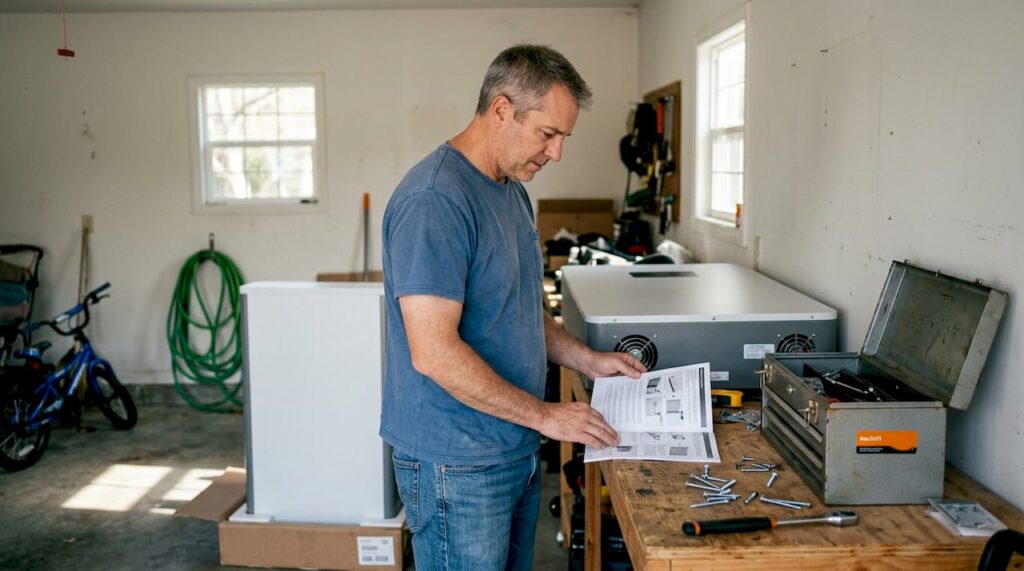
The installation process consists of assessment, permitting, mounting, wiring, and activation. The install day itself is typically completed in 4 to 8 hours, but the overall timeline from first call to activation can stretch longer due to permitting and inspections.
- Site assessment: Your installer evaluates your home’s electrical panel, existing solar setup, shading, and where the battery will be mounted, indoors or outdoors.
- System design and permits: A custom layout is drawn up and submitted to the City of San Antonio and CPS Energy for approval. This stage may take a few days to a few weeks.
- Mounting: On install day, brackets are secured to the wall or floor in the designated location. The battery unit is then mounted and stabilized.
- Wiring and connections: The battery is wired to your inverter and electrical panel. Conduit is run for safety and code compliance. This is the most technical phase.
- System activation: Once wired, the system is powered on, configured, and tested. Controls are set for your preferred backup or self-consumption mode.
Safety note: Working with high-voltage electrical systems is extremely dangerous without the proper training and equipment. Even with the main breaker off, residual energy in a solar system can cause serious injury. Always rely on a licensed electrician or certified solar installer for this work.
Professional vs. DIY: A quick comparison
| Factor | Professional | DIY |
|---|---|---|
| Efficiency | Optimized by design | Often suboptimal |
| Payback period | Faster due to correct setup | Longer or unpredictable |
| Warranty status | Maintained | Often voided |
| Permit compliance | Handled | Homeowner’s burden |
| Safety risk | Minimized | Significantly higher |
For context on how your existing panels interact with the new battery, review details on the panel removal process if any repositioning is required. And for more expert guidance on local solar decisions, Alpha Solar’s expert insights offer practical, San Antonio-specific advice.
DIY vs. professional installation: What homeowners must know
Understanding both options lets you make an informed decision on who should handle your installation.
DIY installation risks warranty voids, lower efficiency, and code violations. Professional installation ensures safety and faster ROI. That’s not just marketing language. It reflects the real consequences homeowners have faced after going it alone.
Here’s what’s at stake with DIY:
- Voided warranty: Most battery manufacturers require certified installers. One misstep and your warranty is gone before the first storm hits.
- Code violations: The City of San Antonio and CPS Energy both require permitted installations. Unpermitted work can result in fines or require you to undo completed work.
- Safety hazards: Lithium-ion batteries store significant energy. Improper wiring can cause fires or electric shock.
- Lower system performance: Incorrect configuration can reduce battery efficiency by 15 to 25 percent, cutting into your expected savings.
- Insurance risk: Some homeowner insurance policies will not cover damage related to unpermitted electrical work.
There are situations where professional installation is not just recommended, it’s legally required. Texas electrical code mandates that all battery interconnection work be performed by a licensed electrician. CPS Energy may also require their own inspection before granting permission to operate.
When you factor in local tax credit details available through the federal Investment Tax Credit (ITC), professional installation often pays for itself faster than homeowners expect. A properly installed system qualifies for the full 30% ITC. A DIY installation with code issues may not. You can explore cost breakdowns for San Antonio homeowners to see how the numbers stack up.
Also consider long-term ROI. San Antonio’s high summer cooling loads mean your battery works hard from May through September. A correctly installed system that is properly sized will perform reliably across many seasons. A poorly configured one may degrade faster and need early replacement.
Pro Tip: When choosing a certified installer, look for NABCEP (North American Board of Certified Energy Practitioners) certification. It’s the gold standard in solar and battery installation and signals that your installer has met rigorous professional standards.
Activation, inspections, and maximizing system benefits
After installation, activating and optimizing your new system ensures you see the full value.

Installation day is exciting, but it’s not the finish line. Before your battery officially goes live, it must pass a final inspection. Activation involves city or utility inspection, setting up system controls, and connecting to grid and backup modes. Residential users can also benefit from CPS Energy’s Time of Use (TOU) rates and the federal Investment Tax Credit.
Here’s what happens after the hardware is in place:
- Schedule your final inspection: Your installer coordinates with the City of San Antonio or CPS Energy. An inspector visits to verify the installation meets code.
- Permission to operate (PTO): CPS Energy issues a PTO letter once inspection is approved. This is your green light to power up.
- System configuration: Your installer sets the battery to your preferred mode. Options include backup-only, self-consumption, or TOU optimization.
- Enrollment in CPS Energy programs: Ask about TOU rate plans that let you store solar energy during low-cost periods and use it during peak hours.
- Claim your tax credits: File for the 30% federal ITC through tax credit opportunities available to residential solar and battery owners in 2026.
Once active, monitoring is your best tool for protecting your investment. Most modern battery systems come with a smartphone app or web portal that shows real-time charge levels, energy flow, and historical performance. Set alerts for low charge or unusual draw patterns.
For a clear picture of ongoing solar cost savings, track your monthly utility bills before and after activation. Many San Antonio homeowners report meaningful reductions within the first billing cycle.
Pro Tip: Configure your battery to switch automatically to backup mode when grid power fails. This is usually a setting in the app or control panel. Without it, your battery may not kick in fast enough during a sudden outage.
Why professional installation in San Antonio pays off long-term
Now that you know the process, here’s a deeper perspective from experienced professionals.
We’ve worked with homeowners across San Antonio who tried to save money by cutting corners on installation. Almost every time, the savings evaporated quickly. A battery that trips a breaker during an August storm is not a backup system. It’s a very expensive piece of equipment sitting on your wall.
Texas has its own grid, its own codes, and its own extreme weather patterns. Those factors make the stakes higher here than in most states. A professional installer doesn’t just hang hardware. They design a system that accounts for your home’s load, your neighborhood’s grid stability, and CPS Energy’s interconnection requirements.
There’s also the insurance and inspection angle. Many insurers in Texas are tightening their requirements around unpermitted solar work. If a battery fire or electrical issue occurs in a DIY install, your claim may be denied. Professional installation with full permits removes that risk entirely.
The benefits of solar are real, but only when the system is set up to perform. We believe that long-term reliability, not just a lower upfront cost, is the metric that matters most for San Antonio homeowners.
Ready for reliable solar battery power in San Antonio?
When you’re ready to install, San Antonio has expert options to help you secure and optimize your investment.
At Alpha Solar Solutions, we handle every part of the process for you, from the initial site assessment and permitting to final inspection and activation. You won’t have to chase down paperwork or figure out CPS Energy requirements on your own.

Our residential solar installation services are designed specifically for San Antonio homeowners who want a system that performs when it matters most. We also offer backup power protection solutions that keep your home running through outages, storms, and peak demand events. Reach out to our team today and let’s build a system that gives you real energy independence.
Frequently asked questions
How long does a typical solar battery installation take?
Professional installation usually takes 4 to 8 hours on install day, but permitting and utility approvals can add several weeks to the overall timeline.
Is DIY solar battery installation safe or recommended in San Antonio?
DIY installation is not recommended because it creates serious safety, warranty, and code risks that can cost more to fix than hiring a professional in the first place.
What are the main approval and permit requirements for solar batteries in San Antonio?
Homeowners need permits from the City of San Antonio and coordination with CPS Energy, plus a final inspection before the system is authorized to operate.
How much can a solar battery improve energy independence?
A properly installed battery can run central AC and essential appliances during outages, and CPS Energy programs like TOU rates allow homeowners to maximize savings by drawing from stored solar energy during peak billing hours.