

TL;DR:
- Proper solar mounting hardware is essential for securing panels and ensuring system longevity on your roof, ground, or pole structure. It involves correct component selection, material compatibility, and thorough preparation to prevent structural failures and leaks. Proper installation practices and documentation protect your investment and help avoid common mistakes such as improper anchoring, incorrect torque, and poor flashing.
Solar mounting hardware is the structural system that physically secures solar panels to your roof, ground, or pole structure and keeps them there for 25 years or more. Getting this hardware right is not optional. Mounting hardware accounts for 8–12% of total installed solar costs but forms the entire mechanical foundation your panels depend on. This guide to handling solar mounting hardware walks you through every phase, from choosing the right components to torquing the final bolt, so your installation is safe, code-compliant, and built to last.
What types of solar mounting hardware are used and why they matter
Solar mounts fall into three main categories: roof mounts, ground mounts, and pole mounts. Each uses a different set of hardware, but all share the same core components.
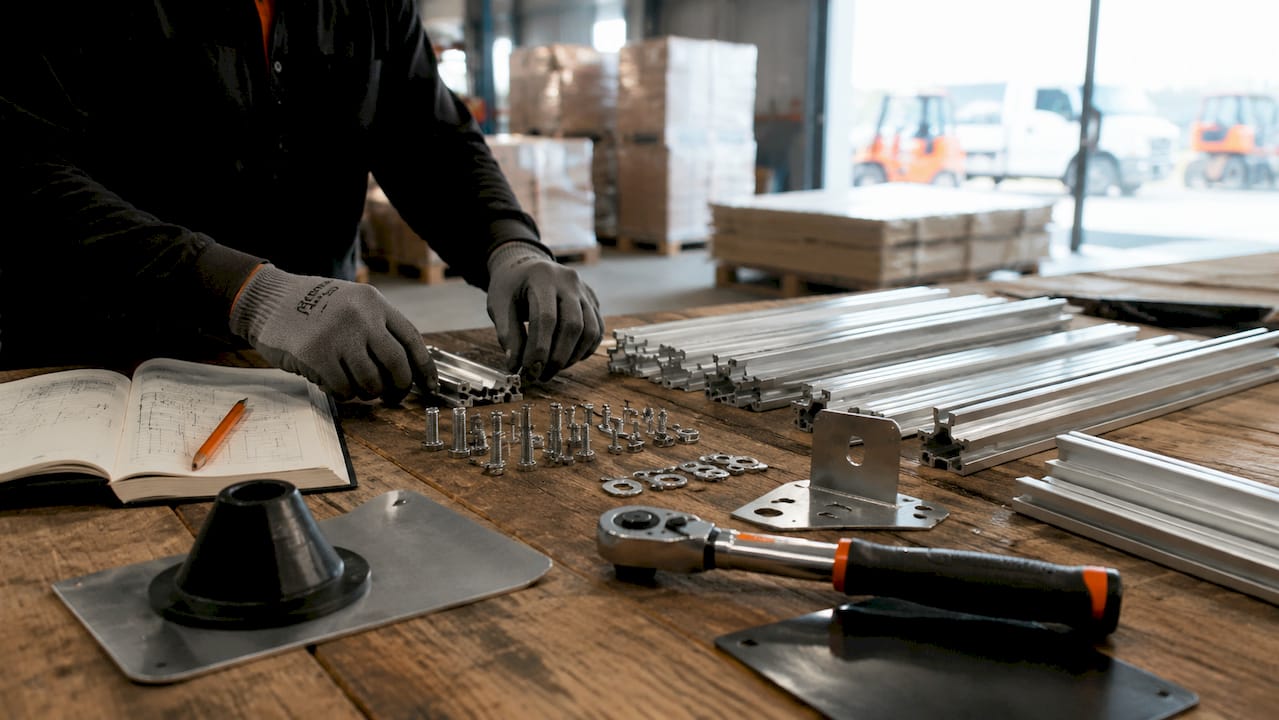
Core hardware components include:
- Rails: Extruded aluminum channels that span across your roof or frame and carry the weight of the panels
- Mounts and brackets: The anchor points that attach rails to your roof structure, ground posts, or pole
- Clamps: Mid clamps and end clamps that grip the panel frames to the rails
- Flashing: Metal waterproofing pieces that seal around roof penetrations
- Grounding components: Bonding clips, grounding lugs, and wire that create electrical continuity across the array
Material choice matters more than most DIY installers realize. Aluminum rails paired with stainless steel fasteners prevent galvanic corrosion and extend system life significantly. Galvanic corrosion happens when two dissimilar metals contact each other in the presence of moisture, and it silently degrades your hardware over years.
| Mount type | Typical hardware | Best application |
|---|---|---|
| Roof mount | Lag bolts, flashing, rails, clamps | Residential pitched roofs |
| Ground mount | Galvanized steel posts, rails, clamps | Open land, large arrays |
| Pole mount | Steel pole, top-of-pole adapter, rails | Remote sites, tracking systems |
Galvanic corrosion occurs when aluminum rails contact galvanized steel without isolation. Using stainless steel fasteners or plastic isolators between dissimilar metals solves this problem completely. Always verify material compatibility before you purchase anything.
What preparation is required before handling solar mounting hardware
Preparation is where most DIY projects succeed or fail. Skipping this phase leads to misaligned rails, failed inspections, and roof leaks.
Key preparation steps:
| Step | What to do | Why it matters |
|---|---|---|
| Structural assessment | Verify roof load capacity with a structural engineer or contractor | Roof load-bearing verification must precede hardware purchase for code compliance |
| Rafter location | Use a stud finder to map all rafters or trusses | Mounts must anchor to structural members, not just sheathing |
| Layout planning | Sketch panel placement, avoiding vents, skylights, and valleys | Prevents rework and ensures proper rail spacing |
| Tool gathering | Torque wrench, drill, level, chalk line, sealant, safety harness | Missing tools mid-job creates dangerous improvisation |
| Permit review | Pull your permit and read the approved plan set | Your Texas solar permit specifies required hardware and spacing |
Typical residential solar mounting takes 1–3 days, but permitting and inspections extend the full project timeline to 2–8 weeks. Plan your hardware purchase and delivery around that schedule so materials are on hand when you are ready to work.
Pro Tip: Mark every rafter location on the roof with chalk before you carry any hardware up. Drilling into sheathing instead of a rafter is the single most common structural mistake in DIY roof mounts.
Safety gear is non-negotiable. A roof harness, non-slip boots, and a hard hat protect you from falls and falling tools. Never work on a wet or frost-covered roof.
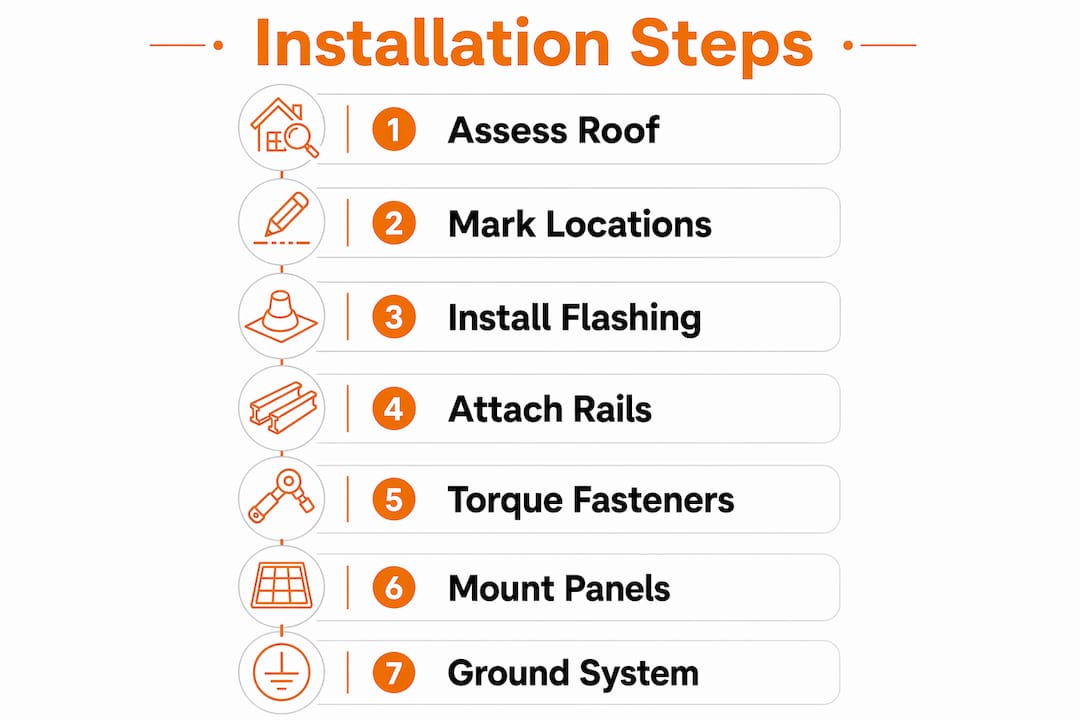
How to install solar mounting hardware step by step
A clean installation follows a logical sequence. Rushing any step creates problems that are expensive to fix later.
Step 1: Mark and lay out mount locations
Transfer your approved layout from paper to the roof. Use a chalk line to mark each row of mounts. Confirm every mark lands directly over a rafter by probing with a small nail or using a rafter finder. Spacing between mounts depends on your rail manufacturer’s span tables, but 48 inches on center is a common starting point for residential arrays.
Step 2: Install flashing and mounts
Drill a pilot hole at each mount location. Slide the flashing under the shingle above the hole before setting the mount. Apply a manufacturer-approved sealant inside the mount base as a secondary seal, not as a substitute for flashing. Water intrusion from improper flashing is a leading cause of rooftop solar failures. Flashing is your primary barrier. Sealant is backup only.
Drive lag bolts into the rafter with the correct embedment depth specified by your mount manufacturer. Improper embedment depth increases the risk of bracket movement during wind events. A bolt that is too short will pull out under load. A bolt that is too long can split the rafter. Follow the spec sheet exactly.
Step 3: Attach rails to mounts
Slide the aluminum rails onto the mount heads and finger-tighten the rail clamps. Use a level and chalk line to confirm the rails are straight and co-planar before final tightening. Misaligned rails cause panels to sit at odd angles and create stress on clamps over time.
Pro Tip: Run a string line the full length of each rail row before tightening any hardware. A 10-minute string check saves hours of realignment later.
Step 4: Set torque on all fasteners
Torque every fastener to the manufacturer’s specification using a calibrated torque wrench. Over-torquing damages frames and under-torquing leads to movement and fatigue. Both failures are preventable with the right tool and the right number. Keep torque records for warranty compliance and inspection documentation. Some jurisdictions require these records at final inspection.
Step 5: Mount panels and establish grounding
Set each panel onto the rails and secure with mid clamps between adjacent panels and end clamps at the row ends. Install bonding clips or grounding lugs at each panel as required by your mount system. UL 2703 is the primary North American standard for solar mounting systems, and bonding resistance must stay below 1 Ω per NEC 690.43. Test bonding continuity with a multimeter before closing out the mechanical work.
Grounding checklist:
- Bonding clip or lug at every panel
- Grounding wire continuous from first to last panel
- Bonding resistance below 1 Ω at each connection
- Ground wire terminated at the system grounding electrode
What are common mistakes when handling solar mounting hardware?
Even careful DIY installers make predictable errors. Knowing them in advance keeps your project on track.
- Anchoring to sheathing instead of rafters. Sheathing alone cannot support long-term wind and snow loads. Every mount must hit a structural member.
- Relying on sealant instead of flashing. Sealant degrades in UV exposure over 5–10 years. Proper flashing installation prevents the most common post-installation failures. Sealant is a supplement, not a solution.
- Skipping torque verification. Hand-tight is not torqued. Use a torque wrench every time.
- Mixing incompatible metals. Aluminum rails touching galvanized steel without isolators will corrode. Use stainless steel fasteners throughout.
- Ignoring grounding continuity. A broken grounding path creates a shock hazard and fails inspection. Test every connection.
- No documentation. Missing torque records, photos, or inspection logs create problems at resale and during warranty claims.
Regular inspections after major weather events catch loose hardware before it becomes a safety issue. A 30-minute visual check each year protects a 25-year investment.
For ongoing care after installation, the post-installation best practices guide from Alphasolarsa covers what to check and how often.
Key takeaways
Proper solar mounting hardware handling requires structural anchoring, correct flashing, calibrated torque, and verified grounding continuity from start to finish.
| Point | Details |
|---|---|
| Hardware is foundational | Mounting hardware supports panels for 25+ years and must meet UL 2703 and NEC 690.43 standards. |
| Material compatibility matters | Use aluminum rails with stainless steel fasteners to prevent galvanic corrosion. |
| Flashing beats sealant | Flashing is the primary waterproof barrier; sealant is a secondary supplement only. |
| Torque records protect you | Document every torque value for warranty compliance and inspector review. |
| Structural anchoring is non-negotiable | Every mount must attach to a rafter or structural member, never to sheathing alone. |
What I’ve learned after years of solar mounting work
The mistake I see most often is not on the roof. It happens at the hardware store. Installers buy their rails, clamps, and lag bolts before they have verified whether their roof can actually carry the load. Verifying roof load capacity is a code requirement, not a suggestion. Skipping it can mean tearing everything off and starting over after a failed inspection.
The second thing I have learned is that the hybrid approach works well for most homeowners. You handle the mechanical mounting, and a licensed electrician handles the electrical connections and final hookup. Hybrid DIY installations optimize safety by combining your hands-on work with professional oversight on the parts that carry the most code risk. This is not admitting defeat. It is smart project management.
Finally, I cannot stress flashing enough. Every leak I have ever seen on a rooftop solar system came down to flashing that was installed incorrectly or skipped entirely. Adding more sealant does not fix a bad flashing job. It just delays the leak by a season or two. Get the flashing geometry right the first time, and your roof will stay dry for the life of the system.
— Anthony
Alphasolarsa is here when the project gets complex
Handling solar mounting hardware yourself is genuinely achievable with the right preparation and the right plan. At some point, though, most DIY installers hit a step where professional eyes make a real difference, whether that is a structural question, an electrical connection, or a permit that needs professional sign-off.
Alphasolarsa provides full residential solar installation services in San Antonio, including layout planning, hardware selection guidance, and complete system installation. If you want a professional assessment before you buy your first rail, or if you need a licensed team to handle the electrical side of your project, our team is ready to help. Reach out to Alphasolarsa and get your solar project moving in the right direction.
FAQ
What are solar mounts and what do they do?
Solar mounts are the structural hardware systems that attach solar panels to a roof, ground frame, or pole. They hold panels securely in place for the life of the system, typically 25 years or more.
How do I choose the right solar mounting system for my roof?
Match your mount type to your roof material and structure. Pitched roofs use rail-based roof mounts with flashing; flat roofs use ballasted or penetrating systems. Always verify your roof’s load capacity before purchasing hardware.
What torque settings should I use for solar mounting hardware?
Follow the torque specifications in your mount manufacturer’s installation guide. Over-torquing damages panel frames and under-torquing causes movement. Use a calibrated torque wrench and record every value.
What is UL 2703 and why does it matter for DIY installers?
UL 2703 is the North American safety standard for solar mounting and grounding systems. Hardware certified to UL 2703 meets mechanical and electrical bonding requirements, which inspectors verify before approving your installation.
How do I prevent roof leaks when installing solar mounts?
Install flashing under the shingle above each mount penetration and apply manufacturer-approved sealant as a secondary measure. Improper flashing is the leading cause of rooftop solar water intrusion. Sealant alone is not a substitute for correct flashing geometry.