
TL;DR:
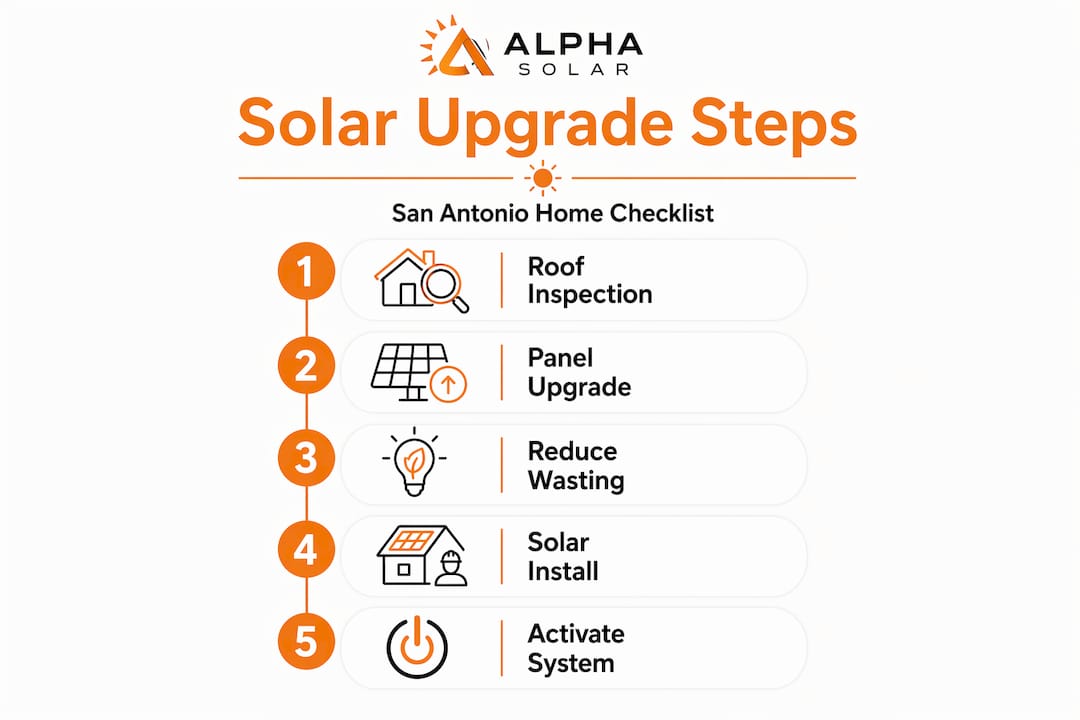
- Homeowners should inspect their roof, electrical system, and energy efficiency before installing solar in San Antonio to prevent costly rework. Prioritizing roof condition, electrical upgrades, and energy improvements ensures a smooth, cost-effective solar project. Following the proper sequence—solar first, then storage, EV charger, and heat pumps—maximizes value and system longevity.
If you’ve been thinking about solar, you already know the pitch: lower bills, energy independence, long-term savings. What most people don’t find out until they’re mid-project is that knowing how to upgrade home for solar requires more than picking panels and calling it done. Your roof condition, electrical panel, insulation, and even the order in which you tackle upgrades can determine whether your solar investment pays off smoothly or turns into a costly sequence of surprises. This guide walks you through every step, tailored specifically for San Antonio homes and the real conditions you’re dealing with here.
Table of Contents
- Key takeaways
- How to upgrade your home for solar: starting with the roof
- Electrical system upgrades for solar readiness
- Improving home energy efficiency before solar
- Sequencing home upgrades to maximize value
- My take on solar-ready home upgrades in San Antonio
- How Alphasolarsa helps San Antonio homeowners go solar right
- FAQ
Key takeaways
| Point | Details |
|---|---|
| Roof readiness comes first | Inspect your roof before installation to avoid costly panel removal later for repairs. |
| Electrical panel upgrades are common | Many older homes need a 200-amp panel upgrade costing $2,500 to $4,500 before solar can be added. |
| Energy efficiency reduces system size | Improving insulation and sealing can cut cooling costs 15 to 20%, allowing for a smaller, less expensive solar system. |
| Sequence upgrades intentionally | Install solar first, then battery storage, then an EV charger, then heat pump systems to avoid wasted spending. |
| Energy audits save money upfront | A professional audit gives you a clear, prioritized list of upgrades so you don’t overspend in the wrong places. |
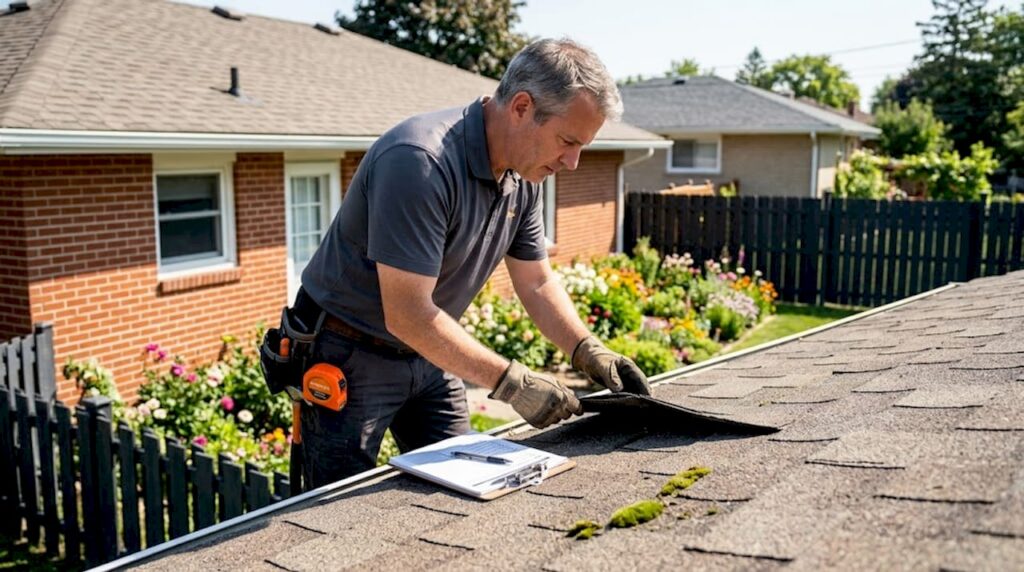
How to upgrade your home for solar: starting with the roof
Your roof is the foundation of your entire solar system. Before a single panel goes up, you need an honest assessment of what’s up there. San Antonio homes often have composition shingle roofs that typically last 20 to 25 years. If your roof is 15 years or older, it’s worth having it inspected before installation.
Roof maintenance before solar is not optional if you want to avoid one of the most expensive surprises in solar ownership. Removing and reinstalling panels for a mid-life roof replacement can add thousands of dollars to a job that should have been done once. Replacing an aging roof before solar prevents this costly rework entirely.
Shading is the other roof-related issue that catches homeowners off guard. You might love that oak tree in your backyard, but 5-10% panel shading can produce a disproportionately large drop in solar output. Even one shaded panel can drag down an entire string of panels depending on your inverter setup.
Here’s what to address before installation begins:
- Roof age and condition. Get a licensed roofer to confirm you have at least 10 to 15 years of life left on the roof. This aligns with the expected lifespan of your solar system.
- Shading sources. Identify trees, chimneys, or neighboring structures that cast shadows on the south or west-facing roof sections, which receive the most sun in San Antonio.
- Roof pitch and orientation. South-facing roofs at a 15 to 40-degree pitch are ideal. A solar installer can assess whether your roof’s angle maximizes production given San Antonio’s latitude.
- Penetrations and flashing. Old or damaged flashing around vents and chimneys should be repaired before panels are mounted to prevent future leaks.
Pro Tip: If trimming trees is needed to reduce shading, schedule that work before your solar site assessment. Your installer will evaluate shading based on what they see during the visit, so clearing obstructions beforehand leads to a more accurate system design.
For more information on how your roof type affects your solar options, the Alphasolarsa roof resource library covers common scenarios for San Antonio homeowners.
Electrical system upgrades for solar readiness
Most of the surprises that delay solar installations happen inside your electrical panel, not on your roof. Older San Antonio homes built before the 1990s often have 100-amp service panels that simply aren’t equipped to handle a solar system plus the modern loads of air conditioning, appliances, and potentially an EV charger.
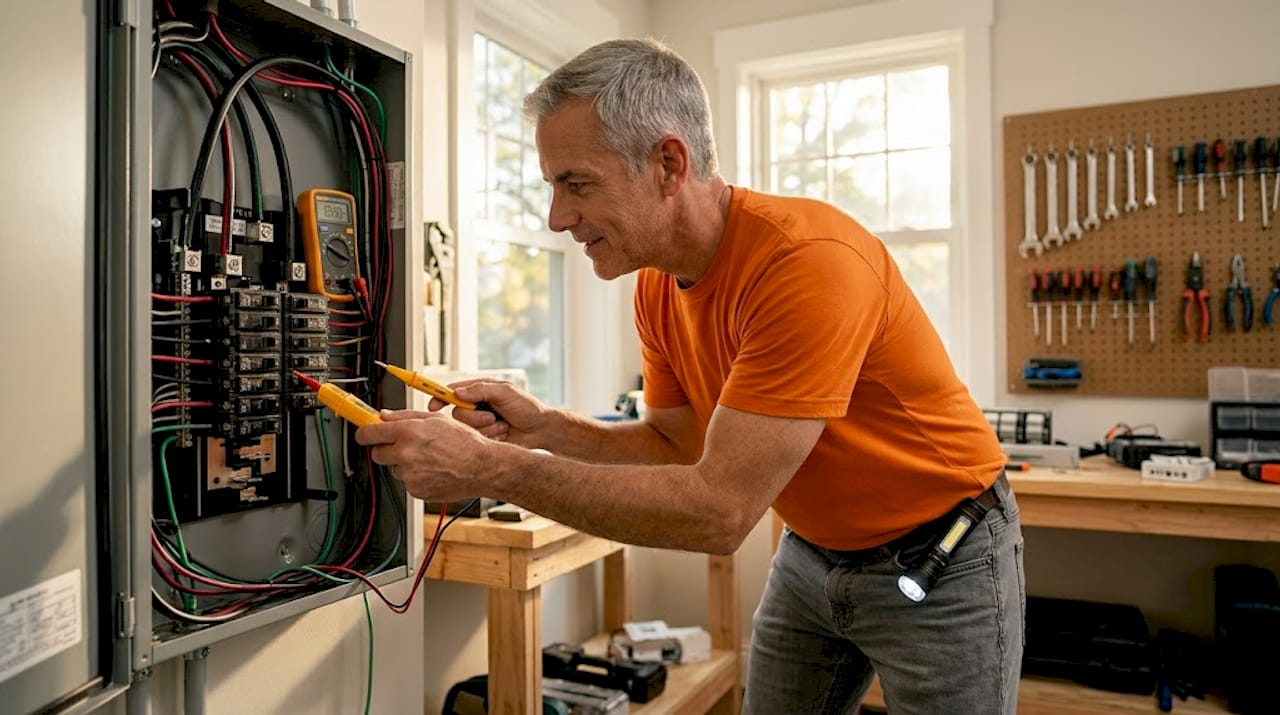
Electrical panel upgrades for solar frequently require a jump to 200-amp service, which costs between $2,500 and $4,500. That’s not a small line item, but it’s far better to budget for it upfront than to discover the need after your installation is already underway.
Homes built before 1985 face an additional layer of complexity. Older switchboards and wiring may need replacement before solar can be safely connected. Some older panels also lack the breaker space needed to add a solar disconnect or battery connection later.
Here’s a quick breakdown of the electrical components worth checking before you commit to an installation timeline:
| Component | What to check | Typical cost if upgrade needed |
|---|---|---|
| Main electrical panel | Amp rating (100 vs. 200 amp), breaker availability | $2,500 to $4,500 |
| Wiring condition | Aluminum wiring, deteriorated insulation | Varies widely |
| Switchboard safety | Outdated equipment, fuse-based systems | $500 to $2,000 |
| Smart meter compatibility | Required for net metering with CPS Energy | Usually covered by utility |
San Antonio homeowners on CPS Energy’s grid will also need a compatible smart meter to participate in net metering, which credits you for power you send back to the grid. Your utility handles the meter upgrade in most cases, but your installer needs to confirm compatibility early in the process.
Pro Tip: Ask your solar installer to walk through your electrical panel during the site assessment, not after you’ve signed a contract. Identifying upgrade needs at that stage gives you time to get competitive quotes for the electrical work and fold it into your total project budget.
Coordinating electrical panel work with your solar installation avoids the expensive problem of having to bring an electrician back to a completed job. Do it once, do it right.
Improving home energy efficiency before solar
Here’s something most solar salespeople won’t tell you: the less energy your home wastes, the smaller the solar system you actually need. And a smaller system costs less. San Antonio’s summers are brutal, and air conditioning accounts for a massive share of most household electricity bills. Fixing efficiency gaps before sizing your solar system means you’re not paying to generate power that’s just leaking out of your walls.
Proper attic insulation can reduce heating and cooling costs by about 15%, and sealing ducts can cut summer cooling bills by 20%. In a city where July temperatures regularly exceed 100 degrees, those numbers are significant.
Before scheduling your solar installation, work through these efficiency improvements in order of impact:
- Schedule a professional energy audit. A data-driven energy audit gives you a prioritized list of exactly where your home is losing energy. It removes the guesswork and prevents you from spending money on improvements that won’t move the needle much.
- Upgrade attic insulation. In San Antonio’s climate, attic insulation is one of the highest-return upgrades available. Most older homes have R-19 or less. Getting to R-38 or R-49 can make a measurable difference in your cooling load.
- Seal air leaks. Gaps around doors, windows, electrical outlets, and plumbing penetrations let conditioned air out and hot air in. Weatherstripping and caulking are inexpensive fixes with an outsized impact.
- Address duct leaks. Leaky ducts in unconditioned attic space are a major source of wasted cooling in San Antonio homes. Sealing ducts and upgrading window efficiency can reduce drafts and lower your overall energy load before solar ever enters the picture.
- Consider window upgrades. If your home has single-pane windows, upgrading to double-pane low-e glass reduces heat gain in summer and heat loss in winter, both of which reduce the burden on your HVAC system.
Pro Tip: CPS Energy offers free or subsidized energy audits for San Antonio homeowners. Take advantage of this before sizing your solar system. It could mean the difference between a 6 kW system and a 4 kW system, which is a meaningful cost difference.
Sequencing home upgrades to maximize value
The most expensive mistake homeowners make is not a bad product choice. It’s doing the right things in the wrong order. Installing a battery backup before you’ve correctly sized your solar system, or adding an EV charger without first upgrading your electrical panel, creates a chain of costly rework and frustration.
The correct upgrade sequence is clear: right-size your solar panels first to establish your generation baseline, then add battery storage, then add an EV charger, and finally consider heat pump systems for water heating or space conditioning.
Here’s why the sequence matters:
- Solar panels first. Your panel array size determines how much power you have to work with. Adding batteries or EV chargers before knowing your generation capacity almost always results in undersized or oversized components.
- Battery storage second. Once your solar system is producing data, you can size your battery backup accurately based on real usage patterns. Adding battery storage too early, before optimizing the solar system, wastes money on capacity you may not need.
- EV charger third. A Level 2 home charger adds meaningful electrical load. Installing it after your panel upgrade and solar system means your system is already designed to handle it. Installing it before can force another round of electrical work.
- Heat pump systems last. These are the biggest load-changers in the lineup. Adding them after the solar system is generating gives you real data on whether you have enough capacity before committing to the switch.
Coordinating all site work together, where possible, dramatically reduces labor costs. If your roof replacement, panel upgrade, and solar installation can be staged within the same project window, you avoid multiple mobilization fees and reduce the total disruption to your home.
A practical timeline for most San Antonio homeowners looks like this: complete your energy audit and roof inspection in month one, schedule roofing and electrical work in months two and three, install solar in month three or four, add battery storage after your first billing cycle, and plan your EV charger or home EV charging installation once you’ve confirmed your electrical capacity is sufficient.
My take on solar-ready home upgrades in San Antonio
I’ve worked with a lot of homeowners who approached solar as a single purchase rather than a whole-home project. They focused almost entirely on the panels and the price per watt. What they missed was the foundation beneath the system: the roof condition, the panel capacity, the insulation quality. And when those things weren’t in order, the project cost more and took longer than expected.
What I’ve found is that the homeowners who come out ahead financially are the ones who invest two to three weeks in the assessment phase before spending a dollar on installation. A roof inspection, a panel evaluation, and an energy audit together might cost a few hundred dollars. But they can easily save you five to ten thousand by preventing rework, right-sizing your solar system, and catching electrical issues early.
The other thing I’d emphasize is the difference between a solar project and a home energy project. Solar is the centerpiece, but the homes that see the biggest bill reductions are the ones where insulation, sealing, and electrical capacity were addressed alongside the panels. Solar generates power. Efficiency upgrades make sure that power isn’t wasted.
San Antonio’s climate makes both of these things especially relevant. Your cooling load is intense from May through October. Every dollar you spend reducing that load before sizing your solar system is a dollar that stretches further on the solar side. Think of the whole project together, not as separate line items.
— Anthony
How Alphasolarsa helps San Antonio homeowners go solar right
At Alphasolarsa, we work with San Antonio homeowners every day who want to make the move to solar without the surprises. Our process starts with a thorough site assessment that covers your roof condition, electrical capacity, and energy usage before we design a single thing. We coordinate residential solar installation with the electrical upgrades and roof assessments you need, so everything happens in the right order and nothing gets done twice.
We also handle EV charger installation, solar panel cleaning, and panel detach and reattachment for roof work, so your project doesn’t require managing three different companies. If you’re ready to stop guessing and start planning, reach out to our team to schedule a consultation. We’ll help you build a clear picture of what your home needs and what your solar investment will actually deliver.
FAQ
How do I know if my roof is ready for solar panels?
Have a licensed roofer or solar installer evaluate your roof before committing to installation. If your roof has less than 10 years of life remaining, replacing it first prevents costly panel removal and reinstallation later.
What electrical upgrades are typically needed before solar?
Many older homes need an upgrade to 200-amp electrical service before solar can be safely installed. This upgrade typically costs between $2,500 and $4,500 and should be coordinated with your solar installation to avoid paying for two separate site visits.
Does improving home insulation before solar actually matter?
Yes, it matters significantly. Attic insulation and duct sealing can reduce cooling costs by 15 to 20%, which directly affects the size and cost of the solar system you need. A smaller, accurately sized system is more efficient and costs less upfront.
What is the right order to add solar, batteries, and an EV charger?
Install your solar panels first to establish your energy generation baseline. Add battery storage second, then an EV charger third. This sequence prevents oversizing or undersizing components and avoids electrical upgrades being done more than once.
Do I need a smart meter for solar in San Antonio?
Yes. CPS Energy requires a compatible smart meter to participate in net metering, which credits you for excess electricity your solar system sends back to the grid. Your solar installer should confirm meter compatibility during the initial site assessment.