

Yes, you can keep water flowing through most residential wells with a battery backup. The two approaches that actually work for homeowners are an inverter fed by a battery bank wired to your existing AC pump, or a dedicated battery-fed backup pump running alongside it. Size the inverter for the pump’s startup surge, size the battery bank for how many hours or days you need, and use a soft-start or pressure tank strategy to shrink both requirements.
TL;DR:
- The inverter must be rated at 5,000 to 6,000 watts peak to handle the startup surge of most well pumps, which can be 2.5 to 5 times the running wattage.
- A typical 3/4 HP pump with a 1,200-watt draw and 4,000-watt surge requires a 4 to 5 kWh LiFePO4 battery bank for two days of backup.
- Proper sizing depends on measuring the pump’s actual power draw and surge, as well as considering well depth and pipe run length, not just manufacturer specs.
- Low-frequency inverters, soft-start controllers, and a dedicated critical-load subpanel improve system reliability and reduce costs by managing motor startup and daily cycling.
- Regular maintenance, including monthly inspections and semi-annual load tests, is essential to ensure your backup system functions correctly during prolonged outages.
Table of Contents
- Quick Options for Well Pump Battery Backup
- How to Read Your Pump’s Power Draw Before You Size Anything
- Sizing Your Inverter and Battery Bank: A Worked Example
- Choosing the Right Batteries, Inverter, and Controls
- Installation and Safety Checklist Before You Flip the Switch
- Recharging Your Battery Bank During an Extended Outage
- What Runtime and Cost Actually Look Like
- Keeping Your Backup System Ready When You Need It
- Why We Recommend Wired Battery Backups Over Quick Fixes
- Get a Custom-Sized Well Pump Backup From Alpha Solar Solutions
- Sources
Quick Options for Well Pump Battery Backup
Most homeowners land on one of four setups once they start comparing well pump backup systems. Each one trades cost against convenience differently, so the right pick depends on your pump’s voltage, how long outages typically last in your area, and what you’re willing to spend.
- Inverter plus battery bank: Wires into your existing AC well pump circuit through a transfer switch. Handles both 120V and 240V pumps, but the inverter needs enough surge capacity to survive motor startup.
- Dedicated DC backup pump: A separate, lower-flow pump powered directly by batteries (often 12V or 24V), installed alongside your main pump. Good for households that just need enough water for drinking, flushing, and basic use during an outage, not full-pressure showers.
- Portable power stations: Battery-in-a-box units with built-in inverters. Convenient for short outages and smaller pumps, but most consumer units can’t handle the surge from a 3/4 HP or larger submersible.
- Hybrid generator plus battery: Batteries carry the load silently and the generator recharges them or picks up bigger draws. This is the setup most homeowners in longer-outage regions eventually choose.
If your pump runs on 240V, pulls more than 15 running amps, or you’re integrating a transfer switch into your main panel, bring in a licensed electrician alongside your well contractor. The math is forgiving. The wiring mistakes aren’t.
How to Read Your Pump’s Power Draw Before You Size Anything
Every well pump battery backup project starts with numbers off the pump itself, not guesswork. Skip this step and you’ll either overspend on an inverter twice the size you need or undersize one that trips every time the pump kicks on.
- Find the nameplate. It’s on the pump housing or the control box, and it lists voltage, full-load amps, and horsepower. A typical 3/4 HP submersible might show 230V and 6.6 running amps.
- Calculate running watts. Multiply volts by amps. In that example, 230 × 6.6 comes out to roughly 1,518 watts, though real-world efficiency losses usually put continuous draw closer to 1,000 to 1,300 watts for a pump this size.
- Identify the startup surge. This is the locked-rotor current the motor draws for a fraction of a second when it starts, and it’s often 2.5 to 5 times the running wattage. That 1,200-watt pump can spike past 4,000 watts at startup, and this number, not the running wattage, is what determines whether your inverter can start the pump at all.
- Factor in total dynamic head (TDH). TDH accounts for how far water travels vertically from the well to your pressure tank plus friction loss in the piping. A deeper well or longer pipe run means the pump works harder, which shows up as higher running amps than the nameplate’s ideal-condition number.
- Measure it yourself if you can. A clamp meter on the pump’s supply wires during a normal cycle gives you real running amps under your specific well conditions, not just the manufacturer’s lab figure. If you can’t get a clean reading, call the pump manufacturer or your well contractor for spec sheet data specific to your model and depth.
Don’t skip the surge number. It’s the single figure most homeowners get wrong, and it’s the reason a perfectly good inverter refuses to start a pump it’s technically rated to run.
Sizing Your Inverter and Battery Bank: A Worked Example
Sizing a well pump battery backup comes down to two separate calculations that get confused constantly: inverter sizing is about surviving a split-second surge, and battery sizing is about sustaining hours or days of actual energy use. Treat them as one problem and you’ll either overspend or end up with a system that won’t start the pump.
Step 1: Confirm running watts. Use the nameplate math from the previous section. For this example, we’ll use a 3/4 HP submersible pump with 1,200 watts of running draw.
Step 2: Confirm startup surge. Installer data consistently shows startup surge landing at 2.5 to 5 times running wattage. For our 1,200-watt pump, assume a 4,000-watt surge, a realistic figure for a submersible motor.
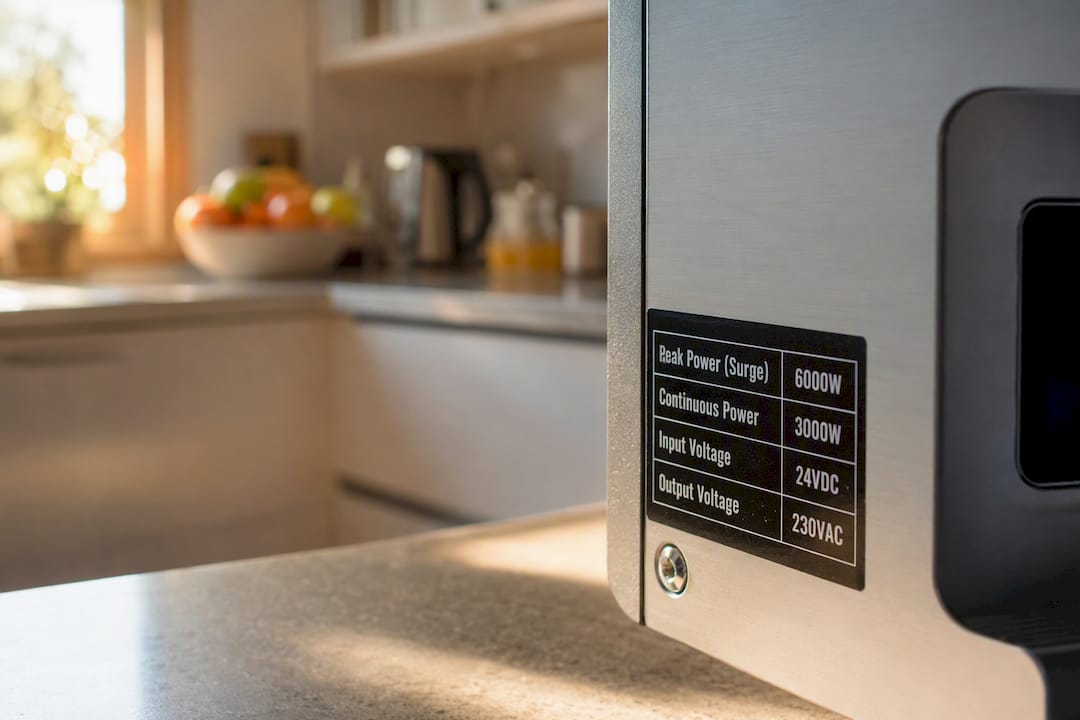
Step 3: Size the inverter’s peak rating. Your inverter’s surge or peak rating needs headroom above that 4,000-watt spike, so a 5,000 to 6,000-watt peak-rated inverter with a continuous rating around 2,000 to 3,000 watts is a comfortable fit. Undersizing here is the number one cause of installer support calls.
Step 4: Calculate daily energy use. Well pumps run intermittently, not continuously, so most households only use 1 to 2 kWh per day for water pumping, even with a pump this size. That’s a fraction of what a running-watts number suggests, because the pump only cycles for a few minutes at a time.
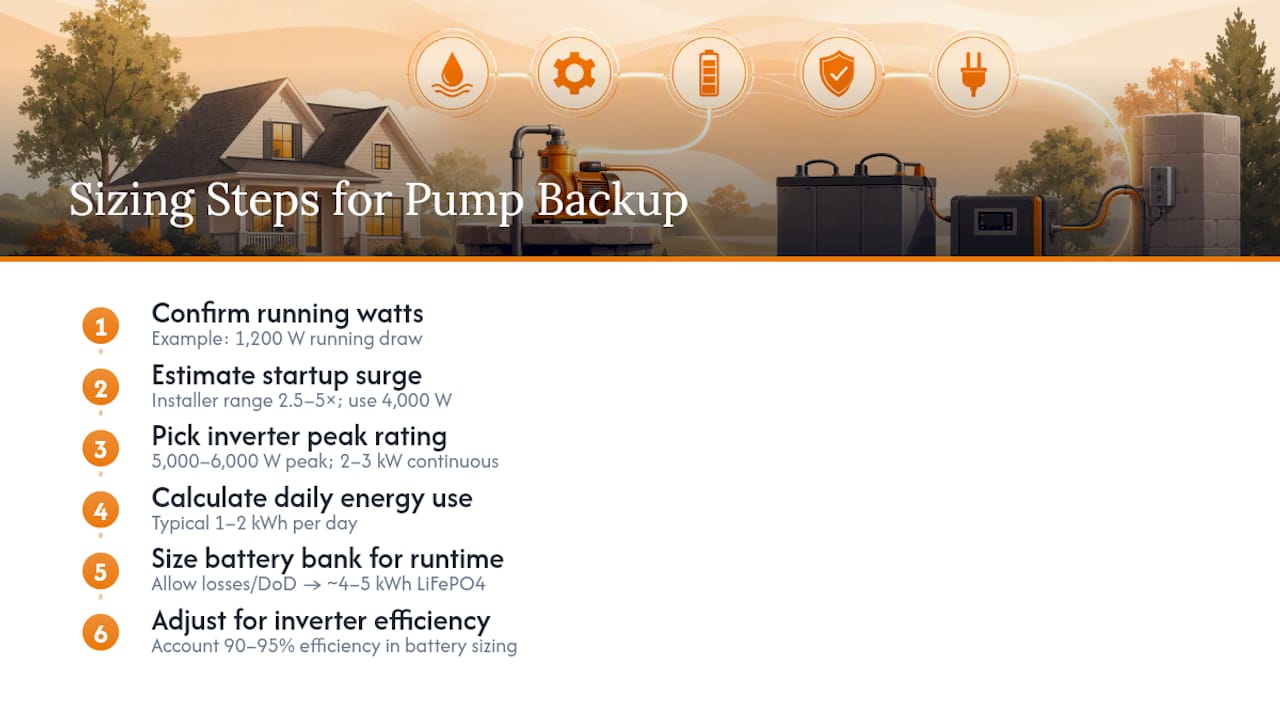
Step 5: Size the battery bank for runtime. For a couple of days backup at a typical daily usage, you need a battery bank sized to cover that energy demand plus losses and depth-of-discharge limits, often resulting in a 4 to 5 kWh LiFePO4 bank appropriate for many systems.
Step 6: Cross-check against inverter efficiency. Inverters typically run 90 to 95% efficient, so build that loss into your final battery number rather than sizing to the theoretical minimum.
Pro Tip: Write down running amps, surge watts, well depth, and daily pump cycles before you call any supplier for a quote. Vendors size systems fast and accurately when you hand them real numbers instead of “I have a well pump, what do I need?”
Before you order anything, confirm you have: nameplate voltage and amps, a surge estimate (measured or from manufacturer spec), your target runtime in hours or days, and whether you’re pairing the battery with solar or a generator for recharge. Those four numbers drive every hardware decision that follows.
Choosing the Right Batteries, Inverter, and Controls
The hardware choices in a well pump battery backup system aren’t interchangeable, and picking wrong here costs more than picking wrong on capacity alone.
Battery chemistry is usually the first fork in the road. LiFePO4 batteries deliver higher usable capacity, faster recharge, and significantly longer cycle life than AGM or flooded lead-acid, and they hold voltage steadier under the heavy draw a pump motor demands. Lead-acid and AGM cost less upfront but typically only allow 50% depth of discharge versus 80 to 100% for lithium, so you need a bigger, heavier bank to get the same usable runtime. For a system you might rely on multiple times a year, LiFePO4 pays for itself in longevity alone.
Inverter type matters as much as size. Low-frequency inverters generally handle motor starting loads better than high-frequency models because of how their transformers manage surge current, which is exactly the kind of load a well pump throws at them. If your home runs a 240V pump, you’ll need a split-phase inverter setup or two stacked units, not a standard 120V-only inverter.
- Soft-start or VFD controllers cut motor inrush by 50 to 70%, which often lets you drop to a smaller, cheaper inverter.
- Automatic transfer switches flip to battery power within seconds of an outage, while manual switches require you to throw a breaker yourself, fine for occasional outages, less ideal if you’re away from home often.
- A dedicated critical-load subpanel isolates the well pump (and maybe a fridge and a few outlets) from the rest of the house, so your battery bank isn’t trying to run the whole home.
- Class-T fuses on the DC side are standard practice for high-current lithium setups because they interrupt fault current fast enough to prevent a battery fire.
- Pressure tank sizing directly affects how often your pump cycles. A properly pre-charged, adequately sized tank means fewer starts, and fewer starts means less battery drain and less inverter stress over a multi-day outage.
- Low-water cutoffs protect the pump motor from running dry, which is a real risk if your well level drops during an extended outage when you’re depending on stored water more than usual.
Pro Tip: A soft starter is often the cheapest single upgrade in this entire project. Spending $150 to $300 on one can drop your inverter requirement enough to save several hundred dollars on the battery system.
Installation and Safety Checklist Before You Flip the Switch
A well pump battery backup involves both DC battery wiring and AC household circuits, and mixing those up, or under-protecting either side, is where DIY installs go wrong. Here’s what needs to happen before the system goes live.
Know your lane. Homeowners can often handle battery placement, ventilation setup, and basic component selection. Anything touching your main electrical panel, a transfer switch, or 240V well pump wiring should go to a licensed electrician. Your well technician handles the pump-side connections, pressure tank, and low-water protection.
- Match wire gauge to the DC current draw, not just the wattage, since undersized conductors cause voltage drop that can prevent the pump from starting even with a correctly sized inverter.
- Use properly rated Class-T or equivalent fuses close to the battery terminals, and torque every DC connection to the manufacturer’s spec, loose lugs are a leading cause of overheating.
- Mount the inverter in a ventilated, temperature-stable space. Garages and utility rooms work; small closets without airflow don’t.
- Confirm grounding and bonding on both the inverter and the transfer switch, and use GFCI protection where code requires it.
- Test the low-water cutoff before you rely on the system, a dry-run pump during an actual outage is an expensive way to find out it wasn’t wired correctly.
- Check local permitting requirements before installation; battery backup systems tied into your electrical panel typically require a permit and inspection in most jurisdictions.
- Run the Saferproducts search on your specific inverter or battery model before buying, recalls and documented failures show up there before they hit mainstream news.
Pro Tip: After installation, run a full simulated outage with the main breaker off, not just a quick five-minute test. Undersized wiring and voltage sag often only show up once the pump has been running on batteries for a while. DIY forums document this exact failure pattern regularly, inverters that trip on startup because a conductor was sized for continuous load, not surge current.
Once everything passes inspection, keep the permit and inspection paperwork with your home records. It matters for insurance claims and for resale.
Recharging Your Battery Bank During an Extended Outage
A battery bank is only as useful as your ability to refill it, and this is where recharge strategy quietly determines your real-world battery sizing.
An AC charger or inverter-charger recharges from grid power the instant it’s back, which is the simplest approach if outages in your area tend to be short and infrequent. A generator-based charger extends that same idea to multi-day outages, since a mid-size portable generator can push several kilowatts into your battery bank in a few hours rather than running the well pump directly around the clock. Solar recharge is the option that turns a battery backup into genuine multi-day resilience without fuel logistics.
- For solar, 24V or 48V LiFePO4 battery banks paired with short, heavy-gauge DC runs keep voltage drop manageable, especially as system size grows.
- Sizing solar for recovery means estimating your local sun-hours and working backward: a 4 kWh daily deficit needs roughly 1.2 to 1.6 kW of panel capacity to recover in a single average day, depending on your region’s insolation.
- A hybrid setup, small generator plus a modest solar array, covers both fast top-ups and steady daily recovery, and it’s the approach Alphasolarsa most often recommends for homes expecting outages longer than a day or two.
- LiFePO4 batteries accept charge faster and more efficiently than lead-acid, so pairing lithium with an MPPT charge controller shortens recovery time noticeably compared to older lead-acid setups.
What Runtime and Cost Actually Look Like
Numbers help more than promises here, so here’s what typical setups deliver once installed.
- 1/2 HP pump: roughly 800 to 1,000 running watts, 2,500 to 3,000-watt surge, often runs comfortably on a 3,000-watt inverter and a 3 to 4 kWh battery bank for 2 to 3 days of typical household water use.
- 3/4 HP pump: as detailed in the worked example, expect a 5,000 to 6,000-watt peak inverter and a 4 to 5 kWh bank for 48 hours of runtime.
- 1 HP pump: higher surge, often 5,000 to 7,000 watts, generally needs a 6,000 to 8,000-watt peak inverter and a 6 to 8 kWh bank for similar multi-day coverage.
On installed cost, a professionally wired inverter-battery backup for a small pump setup typically runs in the low-to-mid thousands, a mid-size 3/4 HP system with a quality LiFePO4 bank often lands in the mid-to-upper thousands, and larger 240V systems with soft-start controllers and a dedicated subpanel push higher still. DIY component costs run meaningfully lower, but factor in your own time, any electrician fees for the panel work you can’t legally do yourself, and the risk of undersizing something on the first attempt.
Costs climb fastest with 240V systems (two inverters or split-phase units), long DC cable runs, permitting fees, and adding a soft-start controller, though that last one usually pays for itself by shrinking the inverter you need.
Keeping Your Backup System Ready When You Need It
A well pump battery backup that’s never tested is a gamble, not a plan. Build a simple maintenance routine and stick to it.
- Monthly: Visually inspect battery terminals, inverter display for fault codes, and check the pressure tank’s pre-charge with a tire gauge (disconnected from water pressure).
- Every six months: Run a full load test, disconnect from grid power and let the system run the well pump through several normal cycles to confirm actual capacity matches expectations.
- Annually: Review battery state of health. LiFePO4 batteries typically hold strong performance for 8 to 10 years or more of regular cycling, while AGM and flooded lead-acid units often need replacement within 4 to 6 years.
- During the test: Log state of charge before and after, note any inverter fault codes, and confirm the low-water cutoff still trips correctly.
Keep a simple log, date, state of charge before and after test, any faults, and pressure tank reading. It takes five minutes and it’s the difference between finding a problem during a calm Tuesday test and finding it during a real outage. Alphasolarsa’s battery backup checklist for homeowners walks through this exact log format if you want a ready-made template.
Why We Recommend Wired Battery Backups Over Quick Fixes
Most homeowners come to us after a portable power station let them down mid-outage, usually because nobody checked the pump’s surge rating against the unit’s peak output. That’s the pattern worth understanding: a well pump battery backup only works if the inverter survives the first half-second of pump startup, and cheap, fast solutions tend to skip that check entirely.
Alpha Solar Solutions designs wired inverter-battery systems for most well pump households because they scale with the home rather than around it, you can add solar later, upgrade the battery bank, or expand the critical-load subpanel without starting over. We reserve dedicated backup pumps for households that genuinely just need basic water access, and hybrid generator setups for regions where outages regularly stretch past a few days. Our installation workflow guide walks through exactly what that process looks like from site visit to final inspection.
— Anthony
Get a Custom-Sized Well Pump Backup From Alpha Solar Solutions
Alphasolarsa is the alternative to guessing your way through inverter and battery specs online, we come to your property, measure your pump’s actual running amps and surge, calculate your real daily water usage, and design a battery backup sized for your well, not a generic online calculator.

As a full-service solar and battery installation company, we handle the site assessment, custom system design, permitting support, and installation in one process, so you’re not coordinating between three separate contractors for your well pump backup, panel wiring, and electrical inspection. If you’re already considering solar for the rest of your home, pairing it with a wired battery backup for your well pump is one of the most practical upgrades we design. Request a residential solar and battery site assessment and we’ll walk your property, check your pump specs, and give you a sizing plan built around your actual water needs.
Sources
- Well Pump Battery Backup System: Sizing Guide | BatteryStorageHQ
- Battery Backup for Well Pump 2026 Buying Guide | Sun Supply PV