
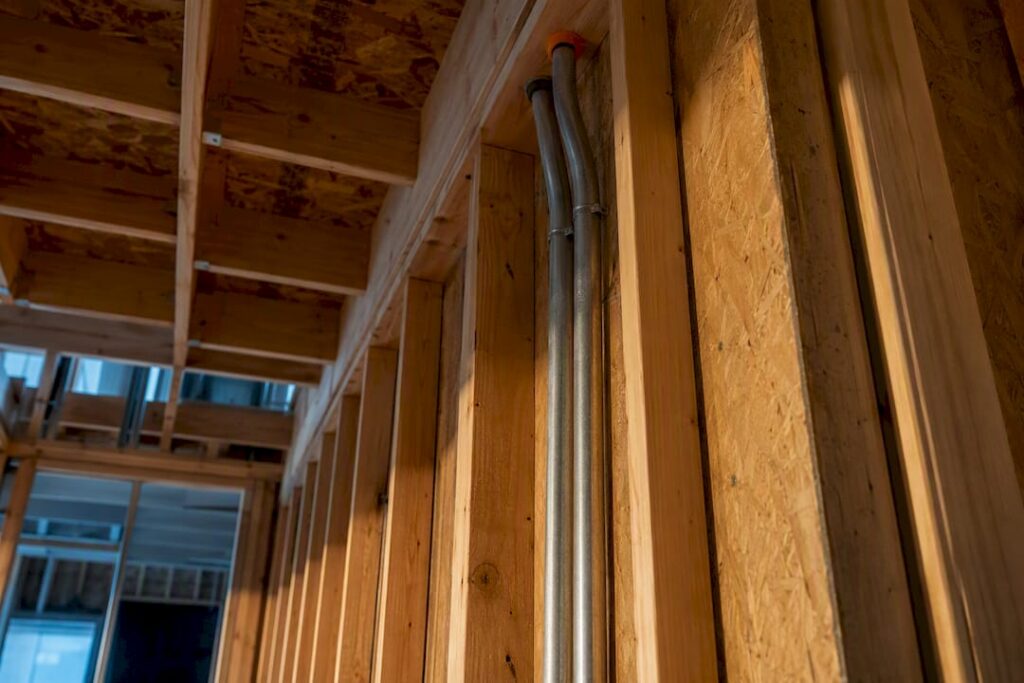
Four items separate a smooth battery upgrade from a demolition project: two empty conduits between your roof cavity and switchboard, spare breaker slots on a properly sized panel, a designated ventilated battery wall, and a decision about AC versus DC coupling before the drywall goes up. Prewiring during construction typically runs $200 to $500, while retrofitting the same conduit runs and panel changes after finishes are installed can cost $2,000 to $5,000 or more. Get these four items right now, and your future electrician spends their time installing a battery, not tearing open your walls.
TL;DR:
- Installing two 1.25-inch conduits between the roof cavity and switchboard during construction costs $200 to $500 and prevents costs of $2,000 to $5,000 for retrofitting later.
- Reserving space for a 12-way panel with two to four spare breaker slots and an 80 to 100 amp main feed during build avoids costly panel replacements and upgrades.
- Planning for a dedicated, ventilated battery wall with sufficient clearance and support prevents expensive relocations and ensures proper access.
- Running separate conduit paths for AC and DC wiring and positioning the inverter close to the battery and panel reduces future installation complexity and costs.
- Documenting conduit routes, panel labels, and critical loads before drywall improves installation efficiency and minimizes delays or change orders.
Table of Contents
- What Should You Prewire for a Future Battery System?
- AC-Coupled or DC-Coupled: Which Wiring Do You Need?
- What Documents Do Installers Need Before They Arrive?
- What Does Prewiring Actually Save You Versus Waiting?
- How Do You Handle Permits and Utility Timelines?
- What Alpha Solar Solutions Sees on Retrofit Jobs
- Should You Prewire Now or Wait?
- Get Your Home Battery-Ready with Alpha Solar Solutions
- Sources
What Should You Prewire for a Future Battery System?
Prewiring for a future battery isn’t just running one wire and hoping it’s enough. It means installing the physical infrastructure, conduit, panel space, wall clearance, and grounding, so an installer can drop in a battery system years from now without cutting into finished walls. Here’s what actually matters.
Empty conduit runs. Install two conduits between the roof cavity (or attic) and your switchboard location, sized around 1.25 inches (roughly 32mm outside diameter). One run handles DC or inverter-related cabling; the other carries AC connections from inverter to panel. If you’re even considering an EV in the next several years, add a third empty conduit stubbed toward the garage now. Running conduit while walls are open costs almost nothing compared to fishing wire through finished drywall later.
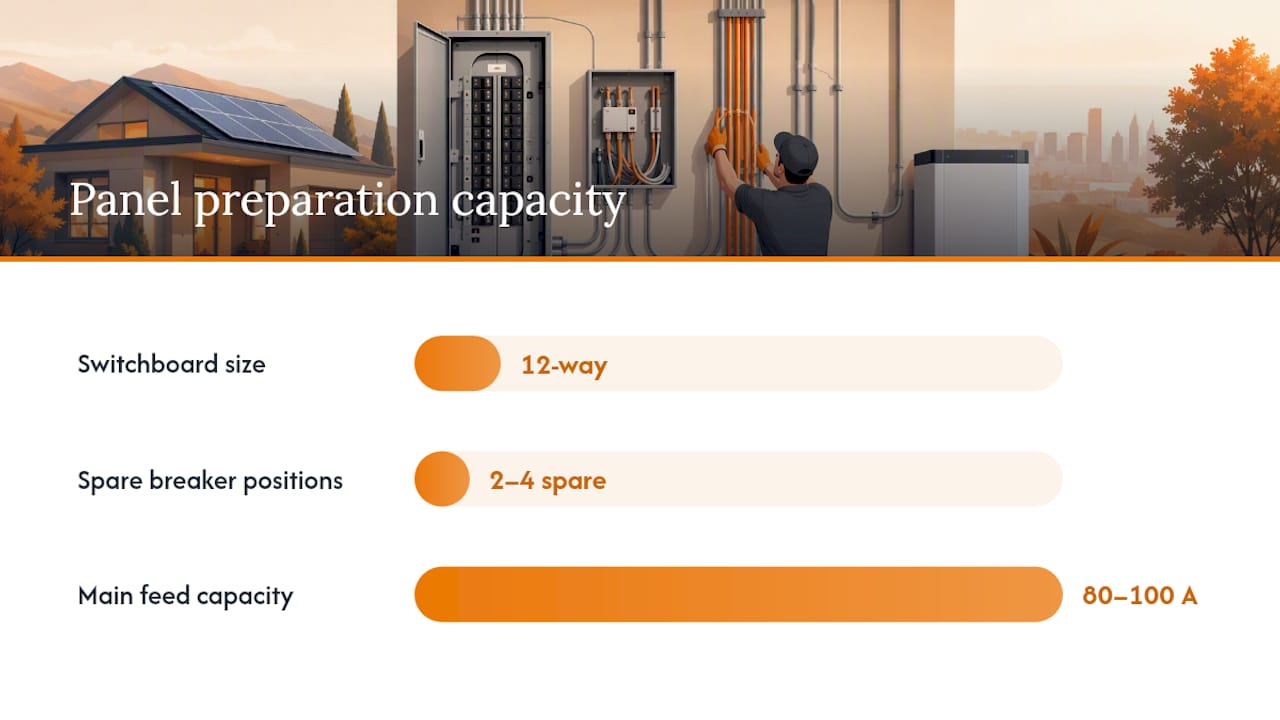
Panel prep. Rewiring America’s electrification planning guidance recommends a 12-way switchboard with two to four spare breaker positions and a main feed sized to 80 to 100 amps. That headroom accommodates solar, a battery, and an EV charger without forcing a panel swap down the line, which is one of the most expensive retrofit surprises homeowners run into.
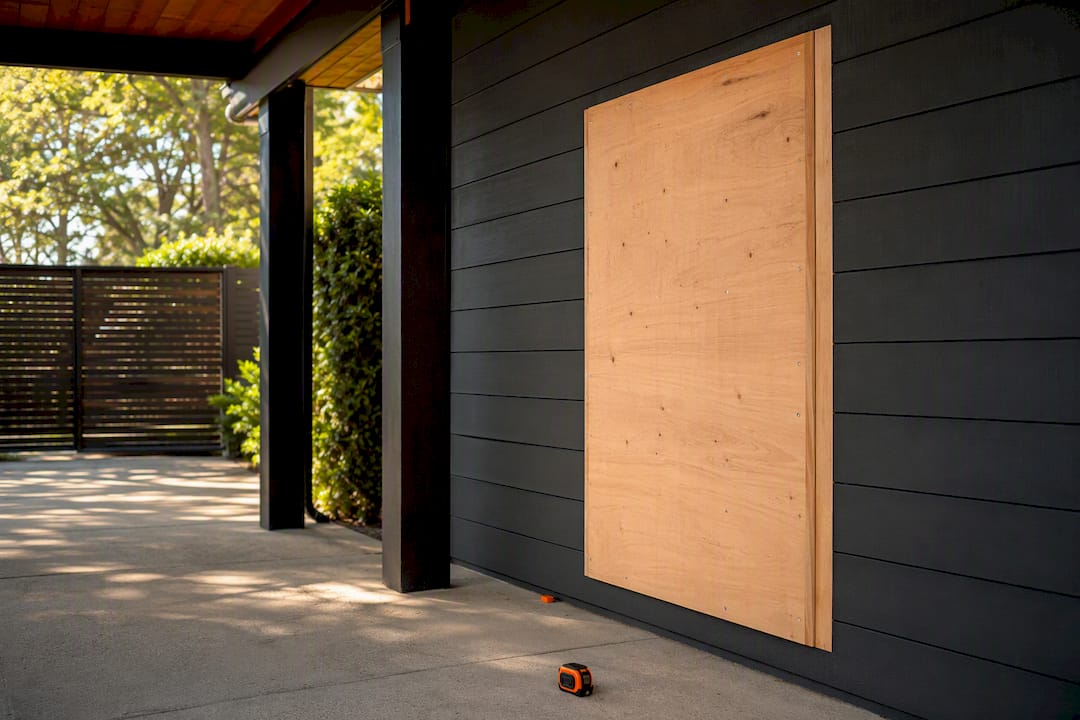
The battery wall. Reserve roughly 1.0 meter by 0.5 to 1.0 meter of wall space with at least 1 meter of clearance in front for service access. Battery units are heavy, some larger systems exceed 150 kg (341 lb), so the mounting surface needs to support real weight, not just a picture hook. Good locations include an interior garage wall or a sheltered exterior wall with cover, away from doorways, windows, and direct sun exposure. If you might add a second battery module later, leave extra cabinet space now rather than squeezing the first unit into every available inch.
Grounding and inverter placement. Position your intended inverter location as close to the panel and battery wall as code and layout allow. Shorter cable runs mean less voltage drop and lower material cost when the system finally goes in. Note your grounding electrode location on the plans so the installer can bond the battery system without adding a second ground rod.
Communication wiring. Run a Cat5e or Cat6 cable from the planned inverter or gateway location to your router or network closet. Installers often prefer hardwired Ethernet over Wi‑Fi for battery monitoring, because a Wi‑Fi outage during a power event is exactly when you need the system talking to you.
Pro Tip: Note any fire-blocking or structural framing your conduit run has to cross while the walls are still open. A quick label on the plans lets your electrician use code-compliant fire-stop fittings instead of discovering the obstruction mid-install.
One more thing worth avoiding: don’t assume a single AC cable to the attic counts as “battery ready.” That’s a common trap that leaves you with a wire but no panel capacity or reserved breaker space to actually use it.
AC-Coupled or DC-Coupled: Which Wiring Do You Need?
The architecture you eventually choose determines where your cables need to connect, and it’s worth understanding before your electrician closes up the walls.
An AC-coupled battery connects on the AC side of your system, essentially plugging in alongside your existing solar inverter and drawing from or feeding into your home’s AC panel. A DC-coupled battery connects directly to the solar array’s DC output through a hybrid inverter, before the power gets converted to AC. Battery systems generally fall into one category or the other, and each demands different cabling and integration points.
Here’s what that means for your prewiring:
- DC-coupled implication: You need a DC conduit run from the roof array down to wherever the hybrid inverter and charge controller will live, plus physical space reserved for that hybrid inverter itself.
- AC-coupled implication: The battery ties into the AC side, so your AC conduit sizing and available panel breaker space matter more than DC routing.
- Undecided implication: Install both. The safest move when you haven’t picked an architecture is reserving two conduit runs and extra panel space so your future installer can choose either path without opening drywall.
Inverter placement compounds this decision. A hybrid inverter mounted near the battery wall shortens DC runs and simplifies a future DC-coupled install, but it may sit farther from your existing solar inverter, adding AC cable length instead. There’s no universally correct answer here. It depends on your roof layout, attic access, and how much you’re willing to guess about a system you might install five years from now. Our solar and battery integration guide walks through how these architecture choices affect different home layouts if you want to think through it further.
If you’re genuinely torn, the conservative approach costs you two conduits and a few extra breaker slots today. Guessing wrong costs you an opened wall later.
What Documents Do Installers Need Before They Arrive?
Good documentation shortens your install day and prevents change orders, those unpleasant surprise line items that show up when an installer discovers something on-site that wasn’t in the paperwork. Here’s what to prepare:
- Photograph your electrical panel with the door open, showing the full breaker directory, along with your meter and any subpanels. Keep both digital and printed copies. Photos and a short written list speed up diagnosis and quoting more than elaborate technical drawings do.
- Label every circuit and write a short critical-load list: refrigerator, sump pump, internet equipment, medical devices, furnace blower. Note which appliances have significant startup surges, since that affects how the installer sizes your backup capacity.
- Mark conduit paths with painter’s tape before finish work begins, and flag any finished surfaces that would be costly to cut into if plans change later.
- Check the mounting wall’s substrate for moisture issues or structural concerns, and keep that section of wall clear of storage, shelving, or anything else that would need to move on install day.
- Build a simple document folder: panel photos, critical-load list, conduit route notes, and contact information for your electrician and builder, so anyone walking the site has what they need without calling you first.
Pro Tip: If your roof work overlaps with prewiring, coordinate conduit penetration points with your roofer before they finish flashing. Planning roof penetrations in advance avoids a second roof visit and a second sealant job later.
Our battery backup checklist covers the fuller version of this list if you want a printable copy to hand your electrician directly.
What Does Prewiring Actually Save You Versus Waiting?
The dollar gap between doing this now and doing it later isn’t small. Reserving a battery wall and running conduit at the design stage costs close to nothing beyond materials and a bit of extra labor time, but relocating a battery or retrofitting conduit later can run $500 to $2,000 in labor alone, on top of any drywall repair and repainting.
Panel upsizing follows the same logic. Adding two spare breaker slots and specifying an 80 to 100 amp main feed during construction adds a modest amount to your electrical budget. Discovering three years from now that your panel can’t handle a battery, and needing a full panel swap, costs dramatically more once you factor in the panel itself, labor, and possibly a service upgrade from your utility.
Permitting adds its own timeline pressure. In many U.S. jurisdictions, permitting for solar and battery work runs four to eight weeks, though SolarAPP+ speeds this up in areas that have adopted it. Interconnection reviews for a new combined solar-plus-battery system can take two to sixteen weeks depending on the utility, while a battery retrofit alone commonly takes four to ten weeks, sometimes as little as two to four weeks where the utility has a streamlined process.
| Prewire item | Build-time cost | Retrofit cost later | Typical savings |
|---|---|---|---|
| Empty conduit runs (2x) | $200 to $500 | $2,000 to $5,000+ | $2,000 to $5,000 or more |
| Spare breaker slots + main feed sizing | Modest add during panel install | Full panel replacement cost | Avoids panel swap entirely |
| Battery wall reservation | Near $0 | $500 to $2,000 in relocation labor | $500 to $2,000 |
Three things drive most of that cost gap:
- Cutting and repairing finished drywall, flooring, or ceiling material that wasn’t touched during original construction.
- Labor rates for retrofit electrical work, which run higher than pre-line work because of the extra time spent protecting finished surfaces.
- Second permit and inspection cycles, which some jurisdictions require for post-construction electrical changes.
How Do You Handle Permits and Utility Timelines?
Permitting and interconnection are two separate approvals, and mixing them up is a common source of delay. A new solar-plus-battery install typically needs a full application: single-line diagram, inverter specifications, and a site plan. A battery retrofit onto an existing solar system usually needs a lighter-weight review, though documentation requirements still vary by utility.
Ask your installer directly which permitting pathway your jurisdiction uses. Some areas have adopted SolarAPP+ for faster approval, but plenty haven’t, and utility-side interconnection review times vary widely even within the same state.
A practical scheduling order looks like this:
- Finalize your electrical plan, including conduit runs and panel sizing, during design.
- Install conduit and rough-in wiring before drywall goes up.
- Schedule your rough-in electrical inspection before walls close.
- Close the panel and complete finish work.
- Book an installer site assessment once you’re ready to add the battery.
- Submit the interconnection application as soon as the site assessment confirms your system design.
Our step-by-step solar project planning guide breaks down how to line up your builder’s schedule with an installer’s engineering timeline, which is usually the trickiest part of coordinating a new build.
What Alpha Solar Solutions Sees on Retrofit Jobs
We walk into a fair number of homes where the homeowner did some prewiring but missed a step, one empty conduit instead of two, a panel with zero spare breaker positions, or a battery wall spot with no service clearance in front. Each of those gaps turns a straightforward install into a longer, pricier job.
The pattern we see most often: a homeowner ran a single conduit for solar years earlier, assuming it would cover a future battery too. It usually doesn’t, because AC and DC cabling need separate paths, and one shared conduit gets crowded fast. A second conduit added during original construction would have solved this for a fraction of the retrofit cost.
Retrofit reality: Conduit and panel work done after finishes are installed can run several times higher than the same work done during pre-line, once drywall repair, repainting, and second inspection cycles get added in.
Our installation workflow guide walks through what our crews actually do on-site, useful context if you want to know what a well-prepped home makes easier for the installer standing in your garage.
- Homes with labeled panels and documented critical loads move through quoting noticeably faster than homes without them.
- Conduit runs marked clearly on-site cut down on exploratory drilling, which is one of the more disruptive parts of any retrofit.
Should You Prewire Now or Wait?
Prewire now if you have a major build or renovation on the calendar. The incremental cost of adding conduit and panel capacity while walls are open is small, and you’ll never get a cheaper shot at it. If you’re only doing cosmetic work, new paint, flooring, that sort of thing, and you have no near-term plans for solar, a battery, or an EV, it’s reasonable to skip the conduit work. Just document your panel layout and wall options now, while you’re thinking about it, so a future electrician isn’t starting from zero.
Your ownership horizon matters more than most homeowners assume. If you plan to stay ten or more years, or you’re likely to buy an EV within five, the math tilts heavily toward prewiring now. Talk through roof pitch, attic access, and which walls have finished surfaces with your builder and electrician before you decide. Those physical constraints often matter more than budget alone.
— Anthony
Get Your Home Battery-Ready with Alpha Solar Solutions
Proper site assessment and prewiring can prepare your home to the exact specs a future battery will need, avoiding exploratory drywall cutting later.

Services include site assessments that map conduit runs and panel capacity, prewire planning for AC or DC coupling, and battery and solar installation when ready. Garage conduit for an EV charger can be run during the same visit to avoid additional trips. Homeowners planning new construction or a major renovation get the most value from doing prewiring early, before finishes go in and options start disappearing. Ready to see what your home needs? Request a residential solar and battery installation consultation and we’ll walk your site before you close up a single wall.
Sources
- Should I prewire my home? | Rewiring America Electrification Planner
- Solar for New Builds NZ: Pre-Wire & Design Guide (2026)
- Solar Battery Pre-Install Checklist for Homeowners
- Home Battery Storage Installation Guide 2026: What to Expect from Start to Finish | Solar Price List